How to Automate App Store Screenshots with swift-snapshot-testing
May 11, 2020You finished your app, and now you have to take screenshots for your app’s page on App Store. Your app supports many languages and devices, so you decided to automate this task. The only tool you heard about is fastlane snapshot, and you decided to try it.
Since snapshot uses XCUITest, you create a UI Test and try to write some code that will get you to the screen you want, with the data you want. After some time, you realise that it’s harder than you thought. Stubbing data is hard and intrusive. The test is fragile.
Can’t I just instantiate my View Controller with precisely the data I want and then take a screenshot of it? Well, the answer is yes, but you’ll have to let go of XCUITest.
In this tutorial, we’ll use the snapshot testing library pointfreeco/swift-snapshot-testing to take screenshots of our app and make them ready for fastlane deliver to use.
Getting Started
Download or clone the starter project here. Open MyAwesomeApp.xcworkspace, then build and run the MyAwesomeApp scheme.
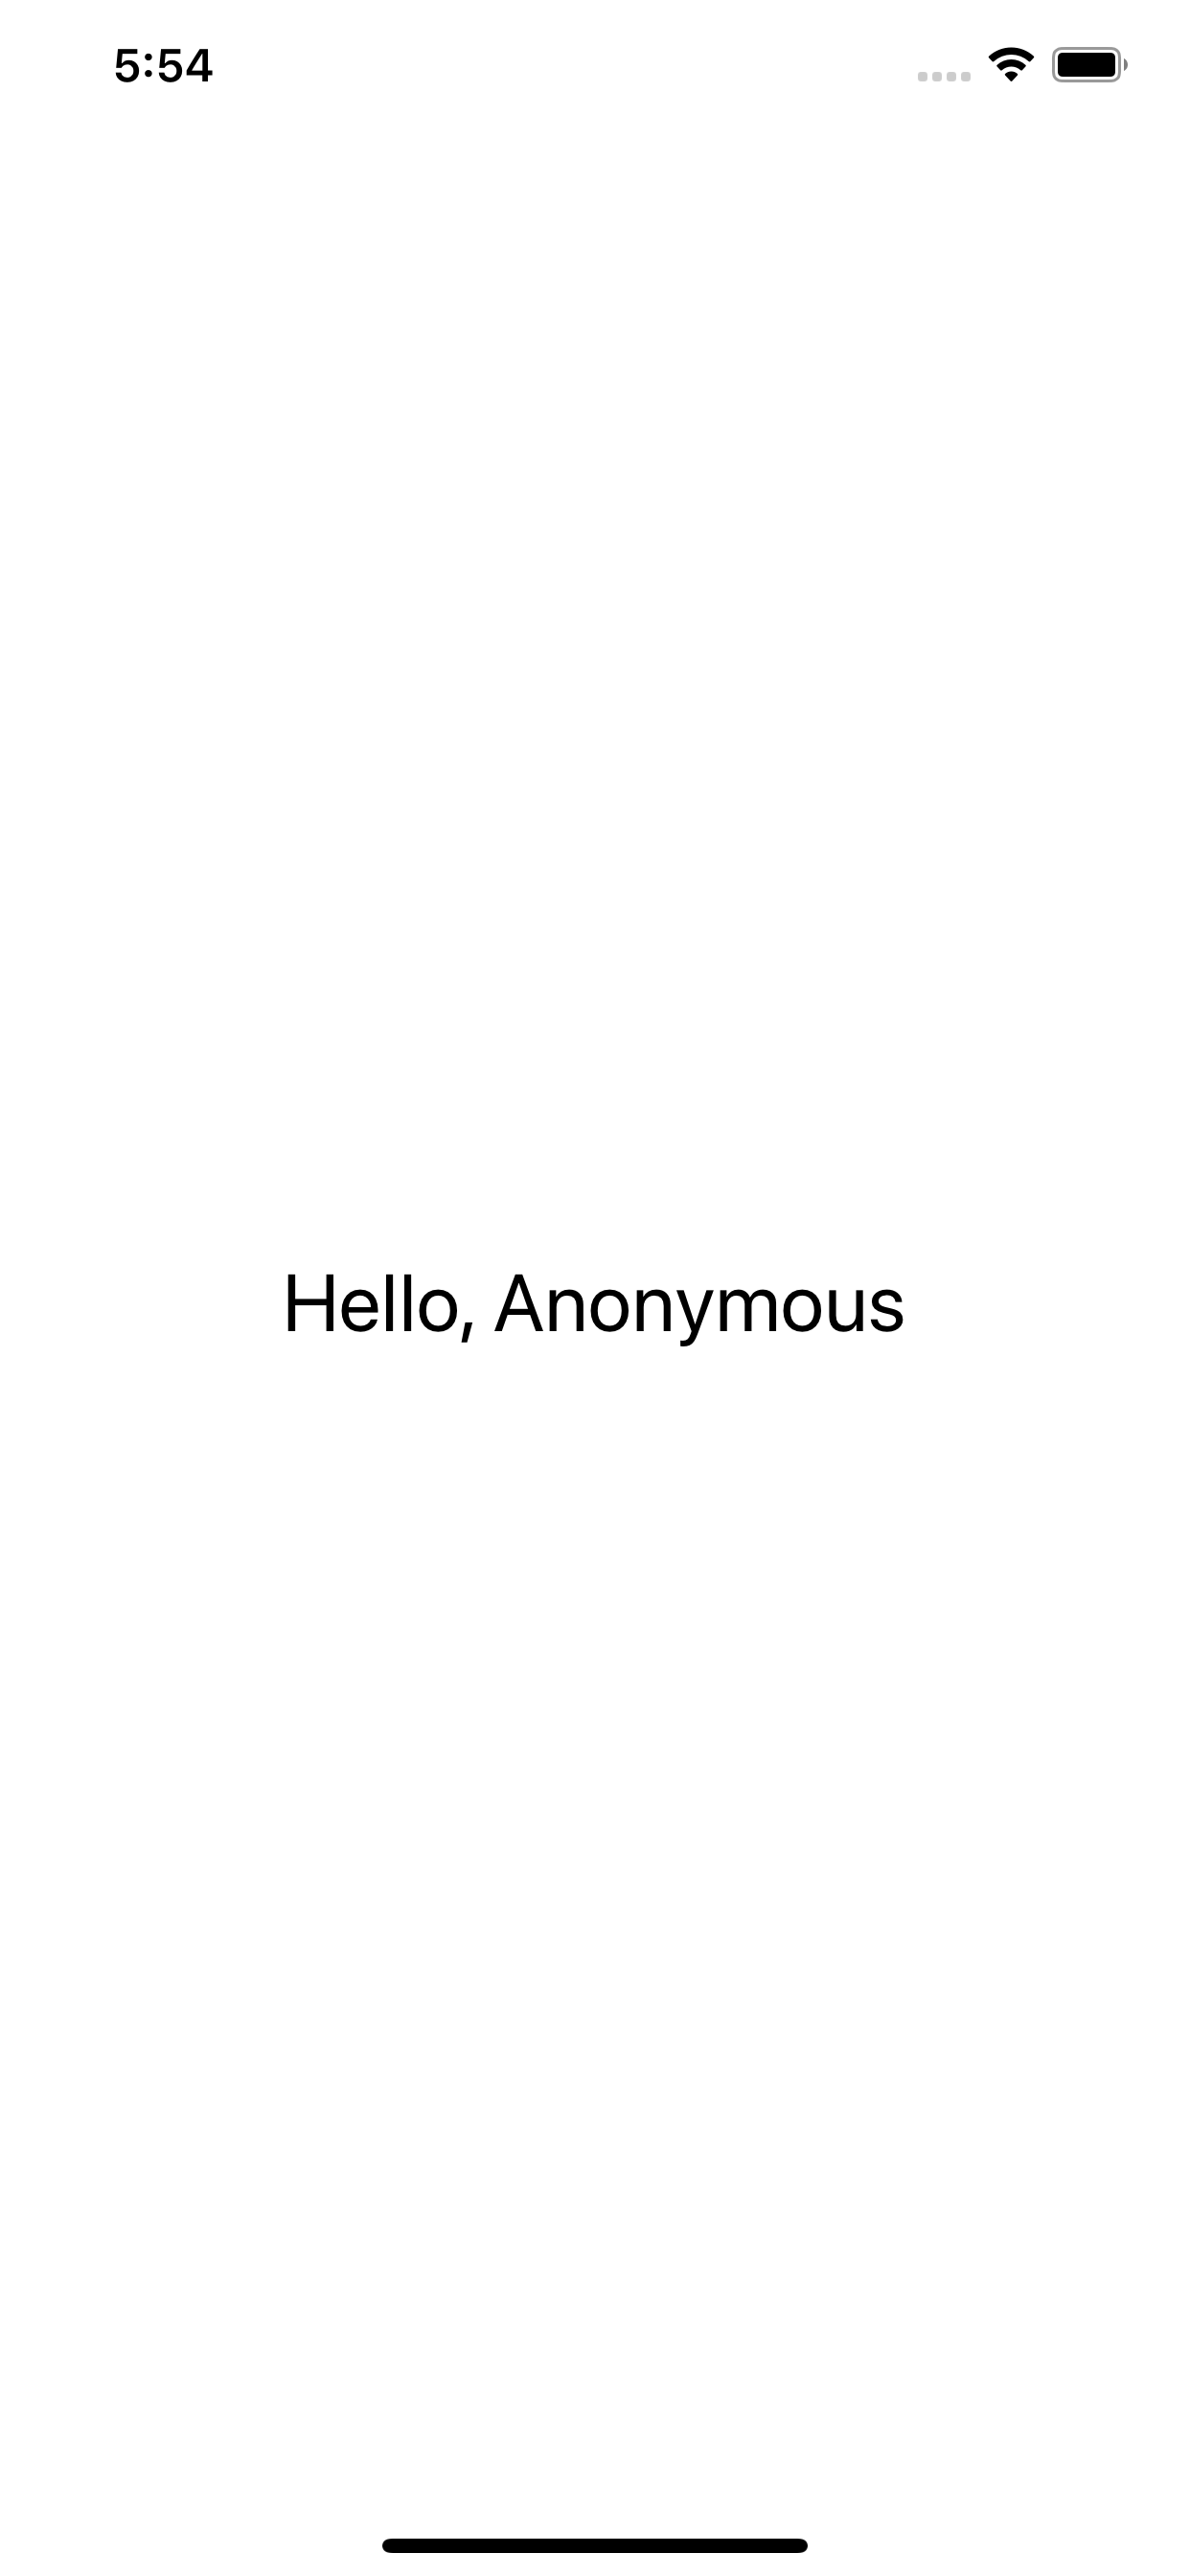
The starter project contains only one screen, the GreetingView. This screen shows a label with the text Hello, <username>. We get the username from UserDefaults, but if we can’t find any, then we use the word Anonymous instead. The app contains translations for en-US, en-AU, pt-BR, and es.
There are two targets in this project: an application target and a dynamic framework target. The app target only contains the AppDelegate.swift, SceneDelegate.swift, and some supporting files. The dynamic framework is where everything else lives. It includes the views, business logic, localized strings, and some helpers.
To control effects from the outside world, we are using the Service Locator pattern explained here. To handle localized strings, we’re using some ideas from the kickstarter/ios-oss project, the Language.swift and LocalizedString.swift files.
There is a playground file MyAwesomeApp.playground that renders the GreetingView in the playground live view. Change the language variable to .pt and check the results in the live view. You can also try different values for the userDefaults.
Now that you’re familiar with the app, let’s get started.
Creating the Screenshots Target
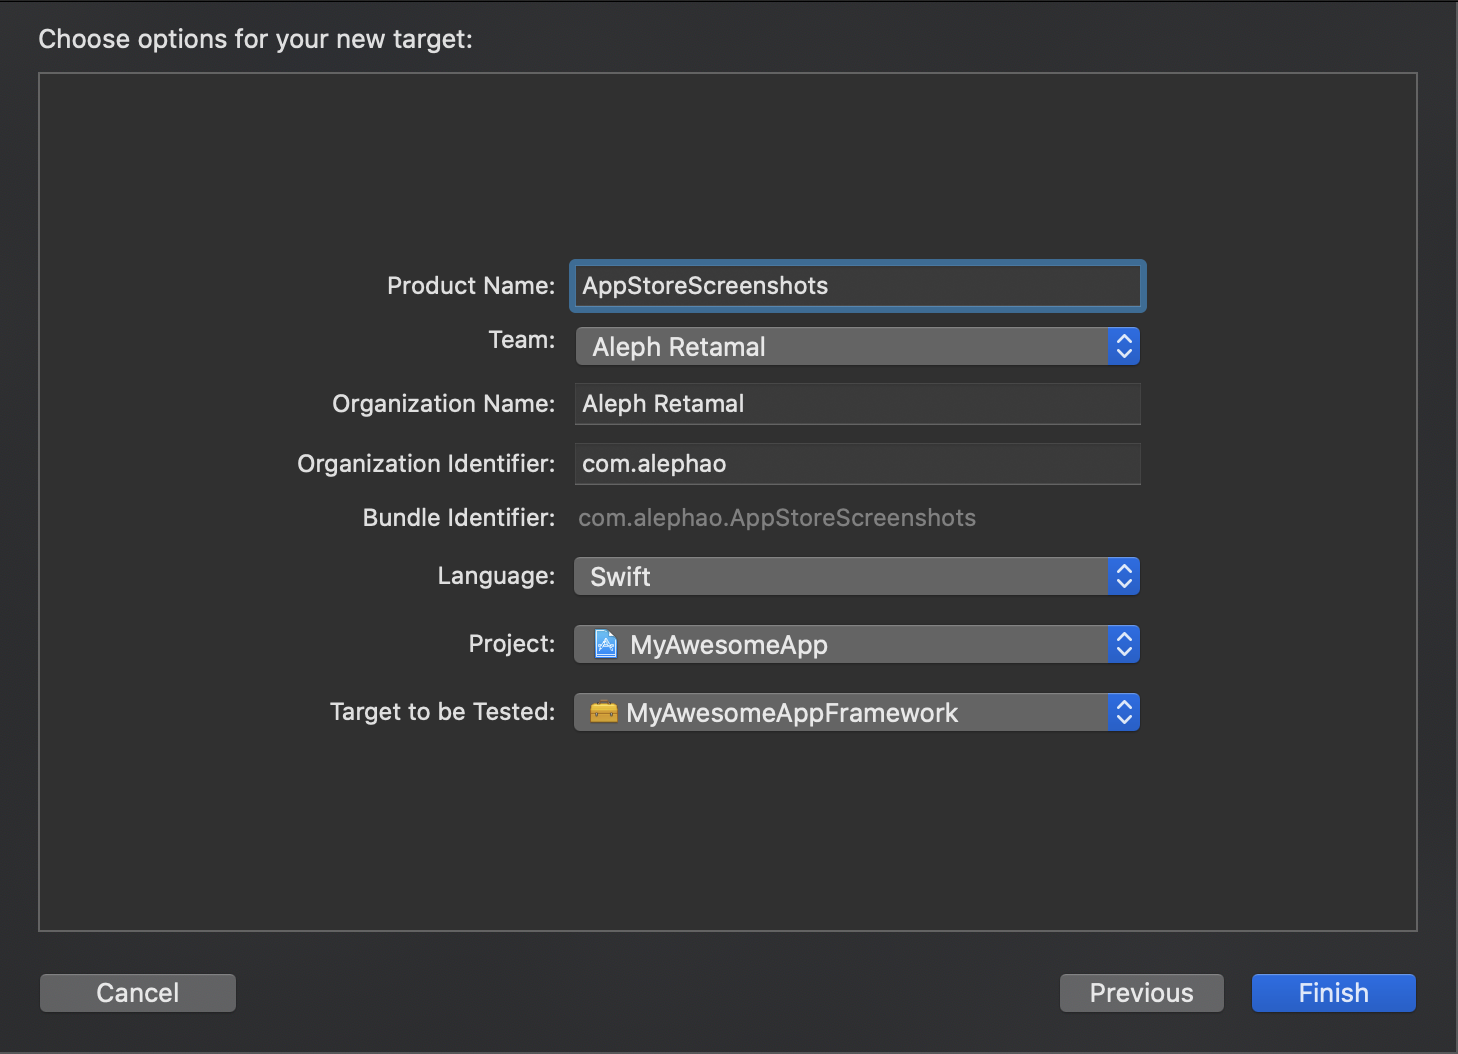
First we need to create the test target that will run our Snapshot tests:
- Open
MyAwesomeApp.xcworkspace. - Select File ▸ New ▸ Target….
- Choose Unit Testing Bundle.
- Name it AppStoreScreenshots.
- For the Target to be Tested box, select MyAwesomeAppFramework.
- Click Finish.
Adding the Snapshot Library
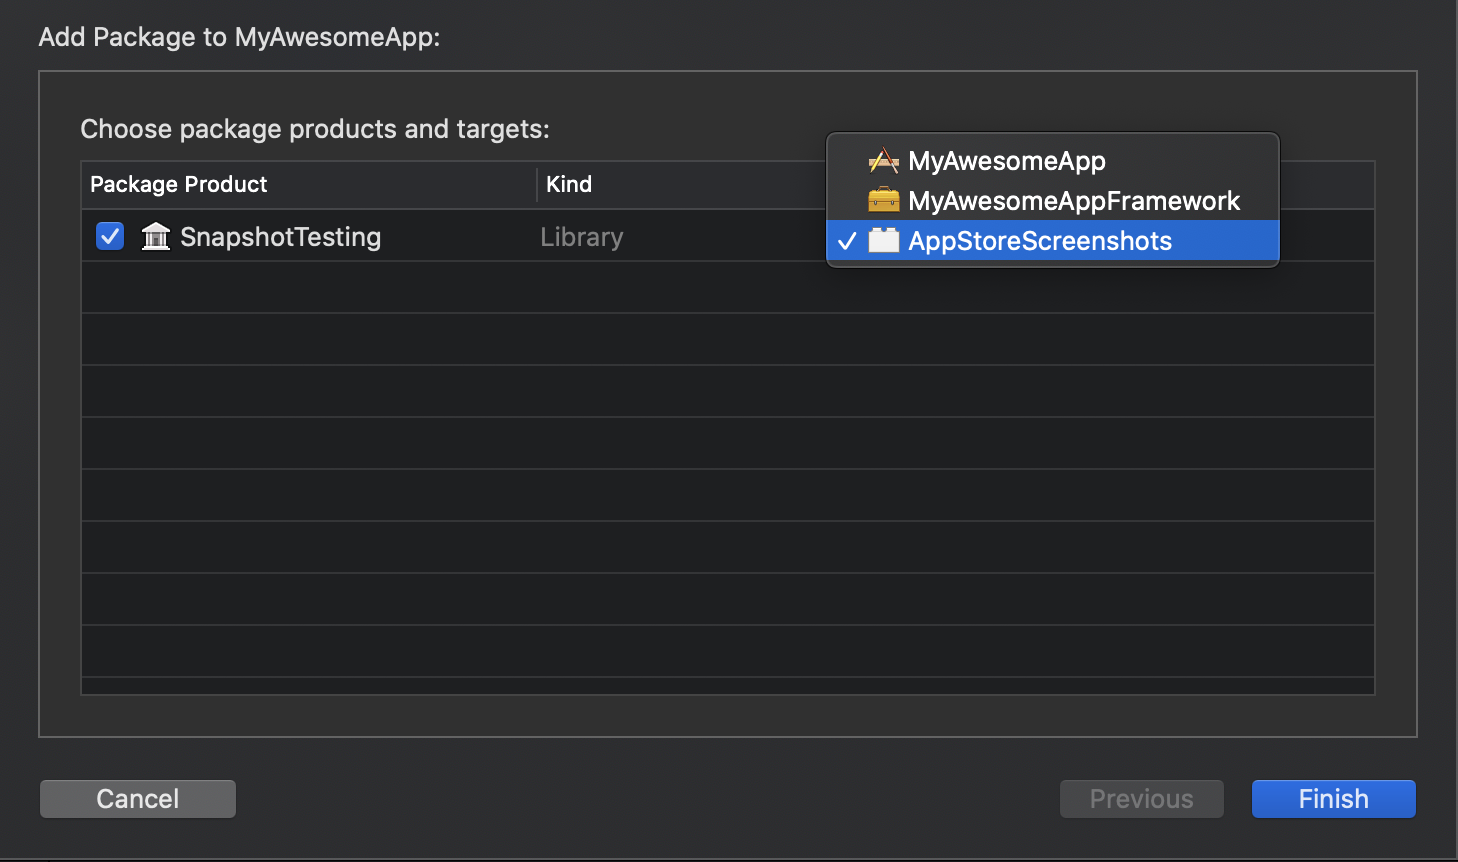
We have our test target ready, now let’s add the swift-snapshot-testing library. We will be using Swift Package Manager in this tutorial.
- Select File ▸ Swift Packages ▸ Add Package Dependency...
- Paste this URL in the textfield:
https://github.com/pointfreeco/swift-snapshot-testing.git. - Click Next twice.
- Select the AppStoreScreenshots target.
- Click Finish.
Adding a Snapshot Test
Now we are ready to start taking our screenshots, so let’s jump straight to it. Open AppStoreScreenshots.swift and add the following import statements:
import MyAwesomeAppFramework // Access to GreetingView
import SnapshotTesting // Access to the snapshot library
import SwiftUI // Access to UIHostingController
To take a screenshot of the GreetingView, create a new test testScreenshots() and add the following lines of code:
func testScreenshots() throws {
  record = true // 1
  let view = GreetingView() // 2
  let vc = UIHostingController(rootView: view) // 3
  assertSnapshot(matching: vc, as: .image(on: .iPhoneXsMax)) // 4
}- We always want to record new screenshots, so we need to set
record = true. - Creating an instance of the view that we want to take a screenshot.
- The snapshot library can’t take a snapshot of a SwiftUI view directly, so we need to embed it in a UIHostingController.
- We use the
assertSnapshotfunction with the.imagestrategy to take a screenshot. Since I want a screenshot for a 6.5-inch phone, I’m using the.iPhoneXsMaxview.
And that’s it. You have your first screenshot test. Run the test with Cmd+U and it should generate a png file in this directory:
<PROJECT_ROOT>/AppStoreScreenshots/__Snapshots__/AppStoreScreenshots/The test works, but it’s not very reliable because if we change the language of the simulator, or if we previously changed the value of UserDefaults, we’ll get a different result. To confirm this, select Edit Scheme ▸ Test ▸ Options and change the Application Language to Portuguese (Brazil). Now rerun the tests with Cmd+U and you’ll see that the new screenshot is generated in Portuguese.
Overriding the Environment
Since we’re using the Service Locator pattern, we can force the view to render with a specific language by overriding the global environment. Let’s create a function for that.
func withEnvironment(
  _ env: MyAwesomeAppFramework.Environment,
  body: @escaping () -> Void) {
  let oldEnv = AppEnvironment.shared.env
  AppEnvironment.shared.env = env
  body()
  AppEnvironment.shared.env = oldEnv
}

func withEnvironment(
  userDefaults: UserDefaults = AppEnvironment.shared.userDefaults,
  language: Language = AppEnvironment.shared.language,
  body: @escaping () -> Void) {
  let env = Environment(userDefaults: userDefaults, language: language)
  withEnvironment(env, body: body)
}
This method runs a snippet of code with a specific environment. It’s similar to the code inside MyAwesomeApp.playground. If you haven’t explored the playground yet, go ahead and give it a try.
Now we can wrap the contents of our test in this function to override the global environment:
func testScreenshots() throws {
  record = true
  let userDefaults = UserDefaults() // 1
  withEnvironment(userDefaults: userDefaults, language: .enUS) {
    let view = GreetingView()
    let vc = UIHostingController(rootView: view)
    assertSnapshot(matching: vc, as: .image(on: .iPhoneXsMax))
  }
}
Now the screen will always be rendered with .enUS and the device language will be ignored.
Generating All the Screenshots
We want to generate screenshots for all supported languages, iPhone-6.5 inch and iPhone-5.5 inch. To get all the possible combinations, we can loop through all languages and devices and then take the snapshot. Add the following snippet to your test, before the withEnvironment call:
let languages: [Language] = [.enAU, .enUS, .es, .pt] // 1
let devices: [ViewImageConfig] = [.iPhoneXsMax, .iPhone8Plus] // 2- The languages we want to iterate through.
- The devices we want to iterate through.
ViewImageConfigis a type from the swift-snapshot-testing library. It contains information about the screen frame and safe area.
Let’s update our test to loop through all values and take the snapshot.
for language in languages {
  for device in devices {
    withEnvironment(userDefaults: userDefaults, language: language) {
      let view = GreetingView()
      let vc = UIHostingController(rootView: view)
      assertSnapshot(matching: vc, as: .image(on: device))
    }
  }
}
Rerun the tests and you should have eight screenshots generated inside the __Snapshots__ folder.
└── __Snapshots__
    └── AppStoreScreenshots
        ├── testScreenshots.1.png
        ├── testScreenshots.2.png
        ├── testScreenshots.3.png
        ├── testScreenshots.4.png
        ├── testScreenshots.5.png
        ├── testScreenshots.6.png
        ├── testScreenshots.7.png
        └── testScreenshots.8.png
Unfortunately, the names of the files aren’t helpful. If we want to use something like deliver to upload the screenshots, we need to separate them by language. Let’s tackle this issue in the next section.
Saving Screenshots in Fastlane Directory
Deliver looks for the app screenshots on <PROJECT_ROOT>/fastlane/screenshots/<LANGUAGE>. So, our next goal is to save the screenshots there.
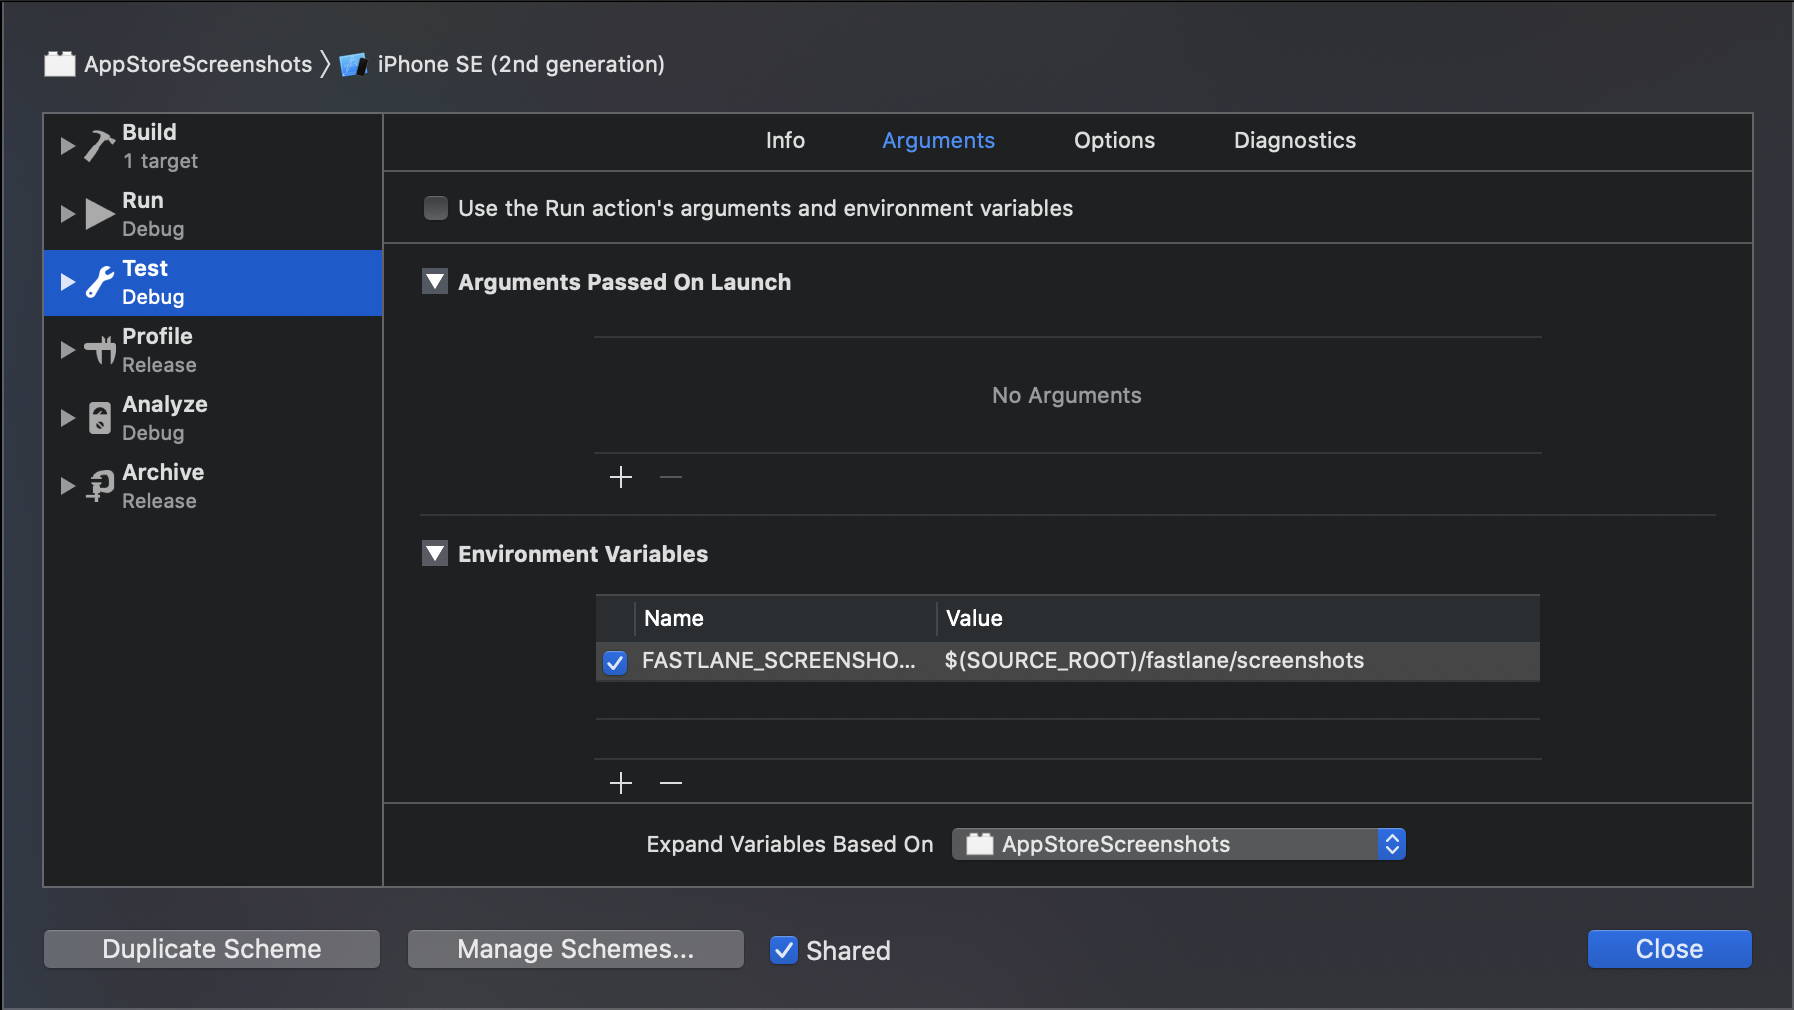
The first thing we need to do is to get access to the path to fastlane in our AppStoreScreenshots.swift file. To get access to the path, we’ll inject an environment variable through the AppStoreScreenshots scheme by following these steps:
- Edit the
AppStoreScreenshotsscheme and navigate toTest ▸ Arguments. - Uncheck the
Use the run action's arguments and environment variablescheckbox. - Add an environment variable with the key
FASTLANE_SCREENSHOTS_PATHand value$(SOURCE_ROOT)/fastlane/screenshots. - On
Expand Variables Based OnselectAppStoreScreenshots. We need this to expand the$(SOURCE_ROOT)variable.
Now we can access the value of FASTLANE_SCREENSHOTS_PATH via ProcessInfo.processInfo.environment["FASTLANE_SCREENSHOTS_PATH"]. Let’s go back to AppStoreScreenshots.swift and force the snapshot library to save the screenshots there.
The assertSnapshot function doesn’t provide us with a way to choose the directory where the file will be saved. To save the files in a different directory, we’ll have to use the verifySnapshot function instead. Add the following snippet to AppStoreScreenshots.swift:
func saveScreenshot(
  matching value: UIViewController,
  as snapshotting: Snapshotting<UIViewController, UIImage>,
  dir: String,
  file: StaticString = #file,
  testName: String = #function,
  line: UInt = #line
  ) {
  let snapshotDirectory = ProcessInfo.processInfo.environment["FASTLANE_SCREENSHOTS_PATH"]! + "/" + dir

  let failure = verifySnapshot(
    matching: value,
    as: snapshotting,
    record: true,
    snapshotDirectory: snapshotDirectory,
    file: file,
    testName: testName,
    line: line
  )
  guard let message = failure else { return }
  XCTFail(message, file: file, line: line)
}
The deliver docs specify the folder names accepted here. Let’s create a function that maps a language to the folder name. Add the following snippet to AppStoreScreenshots.swift:
func folderName(for language: Language) -> String {
  switch language {
    case .enUS: return "en-US"
    case .enAU: return "en-AU"
    case .es: return "es-ES"
    case .pt: return "pt-BR"
  }
}
Now let’s substitute the assertSnapshot function with the saveScreenshot function we just created:
saveScreenshot(matching: vc, as: .image(on: device), dir: folderName(for: language))The final version of AppStoreScreenshots.swift should look like this:
import XCTest
import MyAwesomeAppFramework
import SnapshotTesting
import SwiftUI

class AppStoreScreenshots: XCTestCase {

  override func setUpWithError() throws {}
  override func tearDownWithError() throws {}

  func withEnvironment(
    _ env: MyAwesomeAppFramework.Environment,
    body: @escaping () -> Void) {
    let oldEnv = AppEnvironment.shared.env
    AppEnvironment.shared.env = env
    body()
    AppEnvironment.shared.env = oldEnv
  }

  func withEnvironment(
    userDefaults: UserDefaults = AppEnvironment.shared.userDefaults,
    language: Language = AppEnvironment.shared.language,
    body: @escaping () -> Void) {
    let env = Environment(userDefaults: userDefaults, language: language)
    withEnvironment(env, body: body)
  }

  func testScreenshots() throws {
    let userDefaults = UserDefaults()

    let languages: [Language] = [.enAU, .enUS, .es, .pt]
    let devices: [ViewImageConfig] = [.iPhoneXsMax, .iPhone8Plus]

    for language in languages {
      for device in devices {
        withEnvironment(userDefaults: userDefaults, language: language) {
          let view = GreetingView()
          let vc = UIHostingController(rootView: view)
          saveScreenshot(matching: vc, as: .image(on: device), dir: folderName(for: language))
        }
      }
    }
  }
}

func saveScreenshot(
  matching value: UIViewController,
  as snapshotting: Snapshotting<UIViewController, UIImage>,
  dir: String,
  file: StaticString = #file,
  testName: String = #function,
  line: UInt = #line
  ) {
  let snapshotDirectory = ProcessInfo.processInfo.environment["FASTLANE_SCREENSHOTS_PATH"]! + "/" + dir

  let failure = verifySnapshot(
    matching: value,
    as: snapshotting,
    record: true,
    snapshotDirectory: snapshotDirectory,
    file: file,
    testName: testName,
    line: line
  )
  guard let message = failure else { return }
  XCTFail(message, file: file, line: line)
}

func folderName(for language: Language) -> String {
  switch language {
    case .enUS: return "en-US"
    case .enAU: return "en-AU"
    case .es: return "es-ES"
    case .pt: return "pt-BR"
  }
}
Our test target is ready! Rerun the tests with Cmd+U and check the results. You should have all the screenshots generated in fastlane/screenshots and separated by language in folders. This is how the tree should look like:
├── MyAwesomeApp.xcodeproj
├── MyAwesomeApp.xcworkspace
└── fastlane
    ├── Fastfile
    └── screenshots
        ├── en-AU
        │   ├── testScreenshots.1.png
        │   └── testScreenshots.2.png
        ├── en-US
        │   ├── testScreenshots.1.png
        │   └── testScreenshots.2.png
        ├── es-ES
        │   ├── testScreenshots.1.png
        │   └── testScreenshots.2.png
        └── pt-BR
            ├── testScreenshots.1.png
            └── testScreenshots.2.png
Using Fastlane To Generate the Screenshots
We have everything ready on the Xcode side, but how can we integrate the screenshot generation with fastlane? Let’s start by initialising fastlane. Open your terminal, go to the project folder and run:
$ bundle install
$ bundle exec fastlane init
Choose Manual Setup and press enter until the setup wizard finishes.
To generate our screenshots, we only need to run the tests on the AppStoreScreenshots scheme. To run our tests we can use the scan action. Open fastlane/Fastfile on a text editor and let’s add a new lane to generate the screenshots.
desc "Generate screenshots for App Store"
lane :generate_screenshots do
scan(
workspace: "MyAwesomeApp.xcworkspace",
scheme: "AppStoreScreenshots",
device: "iPhone 11 Pro Max",
fail_build: false
)
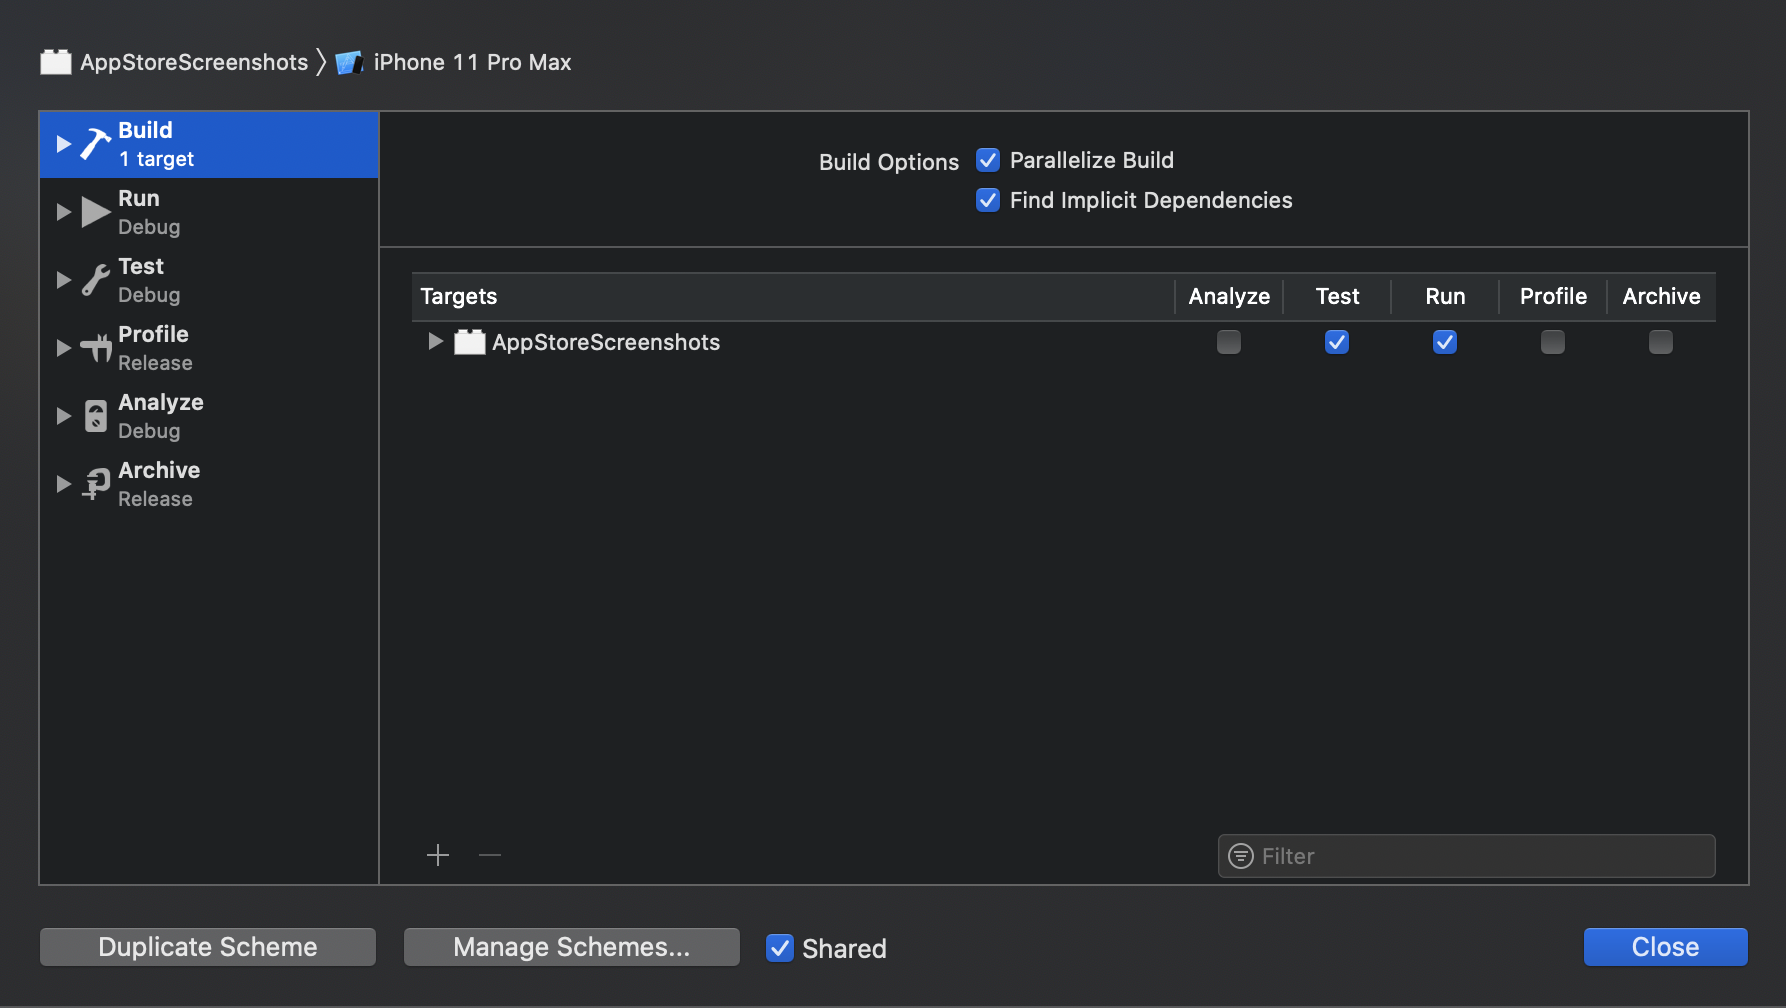
endWe’re almost there, but for scan to work, we need to make a small change on our scheme. Open the project on Xcode, select Edit Scheme ▸ Build and check the checkbox for Run.
We’re ready! Delete the fastlane/screenshots folder to make sure we are regenerating the screenshots. Then run the lane by using this command:
bundle exec fastlane ios generate_screenshotsIt should generate all the screenshots.
Congratulations! You automated the screenshots generation of your app!
Final Words
I hope you enjoyed learning how you can use a snapshot library to generate screenshots for your app page. Now you can integrate this into your pipeline and save some time.
You can check the final project here.
Thanks for reading!